Intro
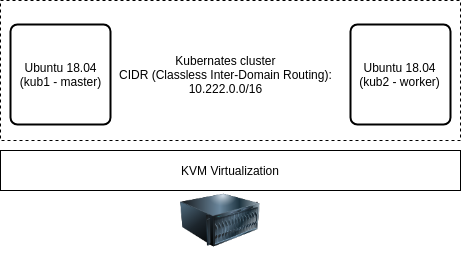
This tutorial installs Kubernates cluster on two Ubuntu 18.04 servers. The network topology is following (but basically it does not matter where the each VM is located):
1. Install requirements on both Ubuntu machines
On both nodes Ubuntu 18.04 server OS is installed, with SSH enabled only, all other packages are not installed.
Execute commands on both nodes (e.g. kub1 and kub2):
$ sudo apt update
$ sudo apt-get upgrade
$ sudo apt install docker.io
$ sudo systemctl enable docker
$ sudo docker --version
Now install the Kubernates it self. Add deb repository keys and repo it self on both nodes.
$ curl -s https://packages.cloud.google.com/apt/doc/apt-key.gpg | sudo apt-key add
$ sudo apt-add-repository "deb http://apt.kubernetes.io/ kubernetes-xenial main"
Now install kubernates:
$ sudo apt install kubeadm
Checking Kubeadm version:
$ kubeadm version
Before continue, Kubernates requires to disable the swap:
$ sudo swapoff -a
To disable swap permanently, in /etc/fstab, edit /etc/fstab and comment off the swap line, for example:
UUID=44cfd840-bd5b-4275-a231-59f798aaa81d / ext4 defaults 0 0
#/swap.img none swap sw 0 0
Set host names on corresponding machines:
On kub1:
$ sudo hostnamectl set-hostname kub1
On kub2:
$ sudo hostnamectl set-hostname kub2
Also ensure that both hosts can be resolved, check the /etc/hosts:
On kub1 should have something like:
127.0.1.1 kub1
192.168.0.96 kub2
On kub2 should have:
127.0.1.1 kub2
192.168.0.95 kub1
2. Installing master on first server (e.g. kub1):
Init the cluster with:
$ sudo kubeadm init --pod-network-cidr=10.222.0.0/16
...

Then you can join any number of worker nodes by running the following on each as root:

kubeadm join 192.168.0.95:6443 --token nffusj.s84179w9u5o2qtwa \
--discovery-token-ca-cert-hash sha256:a4cf37379ded0b6a9b257e8051234569ac321f3c2cef9754262c294e2350fb71
Afterwards for admin user (or any body else who plan to use administer the Kubernates cluster), execute following commands:
$ mkdir -p $HOME/.kube
$ sudo cp -i /etc/kubernetes/admin.conf $HOME/.kube/config
$ sudo chown $(id -u):$(id -g) $HOME/.kube/config
To check the status of the master node, execute:
$ kubectl get nodes
3. Installing second worker node (e.g. kub2):
To join the worker to the cluster, execute the command which was returned from “kubeadm init …” output. In author’s case it was:
$ sudo kubeadm join 192.168.0.95:6443 --token nffusj.s84179w9u5o2qtwa \
--discovery-token-ca-cert-hash sha256:a4cf37379ded0b6a9b257e8051234569ac321f3c2cef9754262c294e2350fb71
4. Back on master machine (kub1)
Once all done, no master node check again the nodes and output shall look similar to this:
$ kubectl get nodes
NAME   STATUS   ROLES    AGE   VERSION
kub1   Ready    master   12h   v1.16.3
kub2   Ready    worker   12h   v1.16.3
5. Trouble shooting
This chapter lists some common problems which author have found during the Kubernates install.
5.1 If after the booting kubadm returns you “The connection to the server 192.168.0.96:6443 was refused – did you specify the right host or port?”
$ kubectl get pods --all-namespaces
The connection to the server 192.168.0.96:6443 was refused - did you specify the right host or port?
Ensure that swap was disabled in /etc/fstab (see above). Temporary do you may do again:
$ sudo swapoff -a
$ sudo service kubelet start
5.2 If you have messed something and want to do all process again…:
You may execute on both nodes:
$ sudo kubeadm reset
afterwards reboot the servers. After reboot you may continue from step 2.
5.3 If node status is “NotReady” (on kub1 – master)
If command “kubectl get nodes” returns NotReady status:
$ kubectl get nodes
NAME STATUS ROLES AGE VERSION
kub1 NotReady master 12h v1.16.3
kub2 NotReady worker 12h v1.16.3
Then use command “describe” to check the state:
$ kubectl describe nodes
In author’s case, from describe it could be seen that:
...
Conditions:
Type Status LastHeartbeatTime LastTransitionTime Reason Message
---- ------ ----------------- ------------------ ------ -------
...
Ready False Mon, 09 Dec 2019 21:33:57 +0000 Mon, 09 Dec 2019 21:26:49 +0000 KubeletNotReady runtime network not ready: NetworkReady=false reason:NetworkPluginNotReady message:docker: network plugin is not ready: cni config uninitialized
...
So there is problem with network.
For this particular case, workaround is to edit /var/lib/kubelet/kubeadm-flags.env file and remove “cni” network plugin, so file after edit (removed –network-plugin=cni):
sudo cat $/var/lib/kubelet/kubeadm-flags.env

#KUBELET_KUBEADM_ARGS="--cgroup-driver=cgroupfs --network-plugin=cni --pod-infra-container-image=k8s.gcr.io/pause:3.1 --resolv-conf=/run/systemd/resolve/resolv.conf"
KUBELET_KUBEADM_ARGS="--cgroup-driver=cgroupfs --pod-infra-container-image=k8s.gcr.io/pause:3.1 --resolv-conf=/run/systemd/resolve/resolv.conf"
Afterwards reboot the host. If fixed, the status shall be:
$ kubectl get nodes
NAME STATUS ROLES AGE VERSION
kub1 Ready master 12h v1.16.3
kub2 Ready worker 12h v1.16.3
